How to Set Push Notifications for All Users on the Skeeta App | Complete Guide
Learn how to set up push notifications for all users on the Skeeta app with this step-by-step guide. Boost engagement and streamline communication effortlessly.

Why Push Notifications Are Essential for User Engagement
Push notifications are like a friendly nudge—they catch your attention without being annoying. For the Skeeta app, they’re a must-have. Let me explain why.
Benefits of Enabling Push Notifications in the Skeeta App
First things first: push notifications keep users informed. Whether it’s a new feature, an update, or just a quick heads-up, they make sure everyone stays in the know. It’s like sending a group text—fast and effective. Plus, they encourage users to open the app more often. Think of it as saying, “Hey, we’ve got something you might like!”
Another bonus? They save you time. Instead of messaging each user individually, you can send one notification that reaches everyone at once. And let’s face it—who doesn’t love saving time?
How Push Alerts Improve Communication Efficiency
Here’s the deal: people are busy. Emails get lost in inboxes, texts get forgotten—but push notifications? They show up right on the screen where users can see them immediately. No digging around or scrolling through clutter. It’s quick and straightforward.
For businesses using Skeeta app how to set push notifications for all users is crucial because it ensures important updates don’t get missed—like event reminders or limited-time offers (nobody likes missing those). It keeps communication smooth and stress-free for everyone involved.
Increasing User Engagement Through Mass Notifications
Now here’s where it gets interesting: engagement! Push notifications aren’t just about sharing info; they also drive action—like opening the app or checking out a new feature right away when curiosity strikes.
By using mass notifications wisely (and not overdoing it!), you create moments where users feel connected rather than annoyed by constant pings from apps competing for their attention.
In short—enabling push alerts in Skeeta helps build stronger relationships between brands and their audience while keeping things simple yet impactful every step of the way. And honestly? That feels pretty good all around, don’t you think?
Getting Started with the Skeeta App Admin Panel
So, you’re ready to dive into the Skeeta app admin panel and figure out how to set push notifications for all users ? Great choice. Let’s walk through this step by step—no fancy tech talk, just simple, actionable advice.
Accessing the Admin Dashboard for Notification Settings
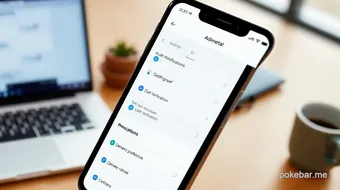
First up, log in to your Skeeta app admin dashboard. Think of it like walking into your favorite coffee shop—you know where everything is, and it feels familiar. Look for the settings icon (usually a gear or cog) in the top-right corner. Click it, and voila —you’re in. If you can’t find it, double-check your user permissions (we’ll get to that in a sec).
Once inside, head over to the Notifications tab . This is where the real action happens. You’ll see options like “Send Push Notifications” or “Broadcast Messages.” Don’t stress if it feels a bit overwhelming at first—just take your time and poke around each section.
Understanding User Roles and Permissions in the Skeeta App
Here’s something I learned from experience: not everyone has access to everything. The Skeeta app assigns different roles—like Admin, Manager, or Editor—and each role comes with its own set of permissions. If you can’t send notifications to all users right now, chances are your role doesn’t allow it yet.
To check your role:
- Go back to your profile settings under Account Info .
- If you need higher access, reach out to your team lead or super admin—they can upgrade your permissions faster than you can say “push notification.”
Navigating the Notification Settings Menu
Alrighty! Time to tackle that notification settings menu like a pro:
1. Start by selecting Broadcast Message from within the Notifications tab—this lets you send messages en masse without breaking a sweat.
2. Next up: choose whether these should be sent instantly or scheduled for later (depending on how urgent they are).
3. Keep your content crisp and clear so people actually read it instead of ignoring it outright ( we’ve all been there ).
4. Don’t forget about the preview feature! Always test before hitting that Send All button because trust me… no one wants typos going viral across their entire user base.
And there you have it! Mastering skeeta app how-to-set-push-notifications-for-all-users isn’t rocket science after all, huh? Just follow these steps closely while keeping an eye out for potential hiccups along the way ( because let's face it... they happen ). But hey—practice makes perfect!
Step-by-Step Guide to Enable Bulk Push Notifications
Hey there! So, you want to send a message to everyone using the Skeeta app? Whether it’s a big announcement or just something fun, setting up bulk push notifications doesn’t have to be complicated. Let me walk you through it—no tech degree required.
Configuring Global Push Alerts for All Users in Skeeta
First, open the Skeeta app and head to the settings menu. Look for the Notifications tab—it’s usually hiding under App Settings . Once you’re there, tap on Global Push Alerts . Easy peasy.
Now comes the fun part. You can set up alerts that go out to every single user at once. Think of it like yelling into a megaphone but without losing your voice (or annoying your neighbors). Just type in your message, pick a time (or send it right away), and hit save. Done!
Pro tip: Always double-check your message before hitting send. Trust me, typos in mass notifications are like glitter—they stick around way longer than you want them to.
Setting Up Bulk Push Notifications in the Skeeta App
Okay, maybe you don’t want to blast alerts randomly. That makes sense! The Skeeta app lets you schedule bulk notifications ahead of time—perfect for big announcements or event reminders.
Go back to the Notifications section and find Bulk Notifications . Here, you can create a new batch by selecting users or groups (or just choose everyone). Write your message—keep it short and sweet—and set a delivery time that works best for your audience. Early morning? Lunchtime? Late night? It’s up to you!
Oh, and here’s a neat trick: You can preview how your notification will look on different devices before sending it out.
Customizing Delivery Options for Mass Notifications
Now let’s talk about customization because one-size-fits-all doesn’t always work when sending messages en masse with Skeeta app how-to-set-push-notifications-for-all-users . In the same Bulk Notifications section, scroll down until you see advanced options like frequency caps or targeting specific regions—super handy if only certain folks need updates while others stay blissfully unaware of unnecessary pings...
You can also adjust sound settings depending on urgency levels: soft chimes versus loud buzzes make a big difference, especially during odd hours. Which brings me to another point: Always think about timing. Unless waking people up at 3 AM is part of your plan (spoiler: probably not), be mindful of when you hit send.
And there ya go! Simple yet effective ways to communicate with large groups using Skeeta’s tools designed to make life easier for both sender and receiver alike. Win-win situation, right?!
Customizing Notification Preferences by User Roles
Alright, let’s talk about the Skeeta app and how to set push notifications for all users. I know it can feel a bit overwhelming at first—like trying to organize a messy desk. But trust me, once you get the hang of it, it’s not so bad. Let’s dive in.
Managing Notifications for Multiple Users efficiently
First off, you need a plan. The Skeeta app lets you handle notifications in bulk, which is huge if you’re dealing with lots of users. Start by grouping them based on their roles—think of it like sorting laundry: whites here, colors there. This way, you can send alerts that actually matter to each group without annoying everyone with stuff they don’t care about.
Here’s my advice: don’t overdo it . Too many notifications? People will tune out faster than a boring TV show. Keep them short, sweet, and relevant.
Tailoring Push Alerts Based on User Roles
Now, let’s talk about tailoring those push alerts based on user roles. Admins might need real-time updates—like when something breaks (because tech loves to break at the worst possible moment). Regular users? They probably just want reminders about deadlines or new features that make their lives easier.
The Skeeta app makes this easy with its role-based notification settings. Here’s how I like to set things up: - Admins : High-priority alerts only (think “urgent” stuff). - Managers : Updates on team progress or project milestones. - Regular Users : Friendly nudges about tasks or events.
It’s like giving everyone their own personalized newsfeed—no junk mail, just the good stuff.
And hey, if you accidentally send something to the wrong group (we’ve all been there), don’t panic. Most settings are easy to tweak on the fly. Just remember: less is more . You want people engaged, not annoyed enough to mute your app forever.
So there you have it—customizing notification preferences by user roles doesn’t have to be rocket science. With a little planning and some trial-and-error (okay, maybe more error at first), you’ll figure out how to set push notifications for all users in no time flat!
Previous article: How to Afford a Porsche Shirt in 2025 Pricing Deals
Next article: Reclaimed Wood Barn Photography Guide 2025 Tips
How to Set Push Notifications for All Users on the Skeeta App | Complete Guide: Share, Rating and Comments
0.0 / 5
0 Review